Tuesday, December 18, 2018

Spontaneous Come Baking


Image result for mixer bird of paradise

BS"D

Do you have a jar of pumpkin pie spice sitting on your shelf just waiting for next Thanksgiving to roll around? I did, but I decided to dust it off and try it in a number of recipes I would normally use cinnamon. Cookies, muffins and bread pudding became lit with the addition of allspice, ginger and cloves from the pumpkin pie spice.  I decided to add it to some oatmeal chocolate chip bars I decided to bake today rather spontaneously.
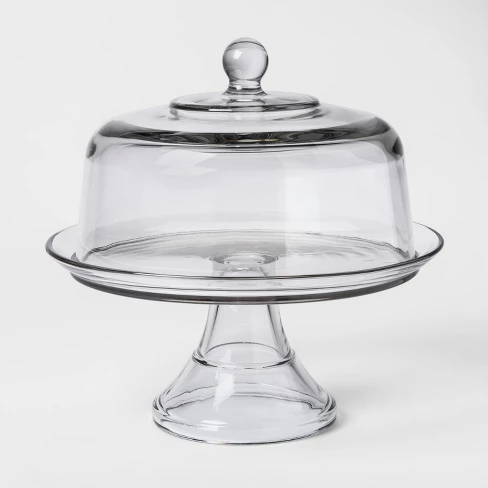
Classic Glass Cake Stand with Dome - Thresholdâ„¢ - image 1 of 1Like a lot of us there are those moments, especially during various holiday times, that you realize some sort of cake, cookie or other tempting non-gf and non-allergy free goodie will be served to a group, and your child is sitting in the corner fiddling with their thumbs. Instead, make sure you have something great for them too. It can be tough, like the time I got a call after 10 p.m. (true story) to ask if I can send in a cupcake the next day, because that mother was making a birthday party in school. "Sure no problem", I thought, " I'm in my pajamas, but was I really THAT interested in going to bed?". So it helps to have some easy recipes that you can make on the fly and in the flash.


Today was one of those days I needed something, but had no interest in complicated or time consuming. I threw together a pan of blondies for which I normally use oat flour. But, I was too lazy to grind the oats I had into flour, so here we go with Oatmeal-Chocolate Chip Bars. They're kind of like a lazy (did I say that already) version of Oatmeal-Chocolate Chip cookies.  They're also really easy if you want to occupy your kids on a cold winter day with a baking project that doesn't make your floor look like a technicolor beach.

You can substitute all or part of the chocolate chips with your favorite mix-ins that fit with your dietary requirements such as: dried cranberries, toffee bits, mini m and ms, caramels cut in pieces, chopped nuts or any chopped dried fruit.


Spontaneous Oatmeal-Chocolate Chip Bars

(Gluten Free and Vegan)

1/2 cup non-hydrogenated margarine (such as Earth Balance Buttery Sticks)
1 1/2 cups brown sugar (light or dark)
1 1/2 cups all-purpose gluten free flour blend with xanthan gum (like Bob's Red Mill 1-to-1 GF Baking Flour)
1 1/2 cups gluten free old-fashioned rolled oats
1 1/2 teaspoons baking powder
1/2 teaspoon sea salt
1 teaspoon pumpkin pie spice or ground cinnamon
1/2 cup non-dairy milk
1 1/2 teaspoons vanilla extract
1 1/2 cups semi-sweet chocolate chips

Pre-heat oven to 350F degrees. Spray a 9x13 inch non-stick baking pan with non-stick cooking spray (optional: line with parchment paper). Set aside.

In the bowl of an electric mixer, beat margarine on medium-high until softened. Add brown sugar and beat until light and fluffy.

Add next five ingredients and beat on medium speed until incorporated. Add milk and vanilla, continuing to beat until incorporated and smooth. Stir in chocolate chips.

Spread batter in pan, smoothing top with a spatula. Bake in preheated oven for 45 to 50 minutes until golden brown.

Allow to cool completely on wire rack. Cut into rows of 6 x 4, yielding 24 bars. Store in an airtight container, or wrap tightly in plastic wrap or foil to freeze.

Yield: 24 bars

Wednesday, December 5, 2018

Perfectly Pie

BS"D

A good friend of mine gave me some advice when I first got the news that Lillie had Celiac disease. She advised me to focus on desserts that were naturally gluten free, like mousses, ice cream and sorbet, instead of banging my head against the wall trying to replicate the texture and flavor of "gluttenny" desserts. Well, of course I didn't let good advice stop me! 

As such, I have a good stable of gluten free (and mostly vegan...for Rosie), cakes, cookies and donuts, but pie crust has been elusive. It's sort of Moriarty to my Sherlock. I'll find a pie crust recipe that looks promising from a reliable source only to end up with a too tough or too crumbly or just blechy tasting product. I've drunk the kool aid that made me believe coconut oil was the answer, and another almond flour. I've used butter, oils and margarine along the way. But in the end, the phrase, "It ends like it began" comes to mind. The key is Crisco! You can whisper it if you like, you can shove the tub under your kale in your shopping cart, but it is the key to a good pie crust--as I knew when I used to make wheat flour crusts. It stats it does not contain trans fats, and it now has "Gluten Free" on its label. Unfortunately, the product still has a stigma as being an unhealthy item. But, in my life at least, pies are a once in a while treat, and I feel it's alright.


With my new found fave crust, I decided to make an apple galette (see recipe below), which is essentially a very lazy pie. It's normally made on a cookie sheet, so you can actually roll out the dough right on a cookie sheet without sides, and bake on the same sheet. The pie recipe below will make a two crust pie, so you can certainly make a regular apple pie. In the picture of my galette, I actually baked it in a pie plate, as I felt it was more stable for travel. I like the galette too, because you don' t have to roll it out perfectly, you can flatten it with your hands if you don't own a rolling pin. Another rolling pin-less trick, is to wrap a wine bottle in plastic wrap and use that for rolling out crust. Whatever way you slice it (pun intended), this pie crust is fab for all your holiday baking and beyond!

Check out my YouTube video on the techniques and hints that will help you make a perfect GF Pie Crust.

This recipe was inspired by an empanada dough recipe by Liza Agbanlo in her book Quintessential Filipino Cooking, which I highly recommend. To use this recipe for a pot pie, or any other savory application like deli roll or empanadas, reduce sugar to 1/4 cup.


Double Crust Gluten Free and Vegan Pie Crust

3 cups all purpose gluten free flour with xanthan gum (such as Bob's Red Mill 1-to-1 Baking Flour)
6 Tablespoons granulated sugar
1/2 teaspoon salt
1 cup vegetable shortening (I prefer Crisco  Sticks), chilled
1/4 cup ice water (measure out the water and add several ice cubes)

In a medium sized mixing bowl, stir together the first 3 ingredients.

Cut shortening into cubes, about the size of dice. If using shortening from a tub, add it to your bowl by teaspoonfuls. Add shortening to flour mixture. Using your fingers, rub shortening and flour mixture between your fingers in a "snapping movement" (see video above at 6 minute mark). You may also cut the shortening in with two knives or a pastry blender.

Once shortening appears to be well coated and incorporated into the flour, add the water a tablespoonful at a time and mix. Unlike wheat flour, you can't overwork your gluten free pie dough (that means building up gluten strands for a tough, not flaky texture). The dough should be firm and hold together after 2-3 tablespoons of water, but you may add the full 1/4 cup if you need.

Note: Unlike wheat pastry dough, I skip the chilling step.

Form dough into two rounds and use as desired. If not using immediately, wrap tightly in plastic wrap and refrigerate for up to 3 days or freeze. Bring back to room temperature before using.


This recipe works well with pears and peaches too!

Apple Galette (or Lazy Apple Pie...see I'm even too lazy to choose a title)

3 Granny Smith Apples, peeled, cored and sliced in 1/2-inch thick slices
1 teaspoon pure vanilla extract
1/4 cup brown sugar
1/2 Tablespoon corn starch
1 teaspoon ground cinnamon
1/4 teaspoon ground nutmeg
1/4 teaspoon ground ginger
pinch sea salt
1/2 of pie pastry recipe above

Pre-heat oven to 400F degrees. Line a large cookie sheet with parchment paper (alternatively, a pie plate sprayed with non-stick cooking spray may be used.

In a medium sized mixing bowl, combine all the ingredients except for the pastry.

Form the pastry into a ball and flatten slightly with your hand. Place pastry in center of parchment paper. Place a second piece of parchment paper (of equal size to the first) over the dough and roll out into a circle approximately 1/4-inch thick. Remove top piece of parchment paper and carefully lift parchment paper and transfer dough to cookie sheet leaving bottom piece of parchment intact. Note: If you have a rimless cookie sheet, dough may be rolled right on cookie sheet. If you are using a pie plate, flip dough into pie plate and discard parchment paper.

Arrange the apple slices in an overlapping circular pattern in the center of the pastry dough, leaving a 1 1/2 -inch margin all around.

Fold margin of pastry dough over apple slices. You may use a knife or spatula to help "flip up" the dough.

Bake in pre-heated oven for approximately 40 to 50 minutes, until apples are soft when pierced with a fork, and dough appears light golden brown.  Allow to cool for 10 minutes on a wire rack. Serve warm galette with whipped cream or ice cream. 

Serves: 8-10


Monday, November 5, 2018

Blondies have more fun.

BS"D
Related image

So just a couple of months into the school year I'm hearing the lunchbox blues being sung. Cue harmonica music: I hate my snacks, I'm so tired of xyz all the time, I'm still hungry (I send about 4 snacks a day because the teachers make it seem like they're scaling Everest, not learning times tables).  So I need to shake things up a bit. Here are some fun items (mostly from Costco), that can keep things interesting: mini peppers dipped in individual guacamole, individual apple slices (they actually work out about the same as a whole apple and you don't get complaints), nori sheets, deli rolled around cucumber spears, dried mango slices.

Image result for mini peppers


But of course the best surprise is a home baked goodie. I've been trying to find a blondie recipe that was easy, didn't use weird ingredients and had a great taste and texture. When you are baking gluten free and vegan that can be a tall order. But with a little tinkering of a non-gf and non-vegan recipe, I came up with something I love. It is soft and chewy and just everything I want in a blondie.

Post below with your lunch box ideas.  Sharing is caring ;)

If nuts are not allowed in your diet or your school, you can substitute an equal amount of oat flour for the almond flour (you may old fashioned oats you process finely in the food processor).


Chippy Girl Blondies

1 cup non-hydrogenated margarine (like Earth Balance Buttery Sticks)
1 cup granulated sugar
1 cup dark brown sugar, packed
2 teaspoons vanilla extract
½ cup unsweetened applesauce
2 tablespoons ground golden flax meal stirred into ¼ cup water (let sit for 10 minutes)
1 ½ cups gluten free flour blend with xanthan gum 
1 cup almond flour (can sub 1 cup oat flour or 1 cup GF flour blend)
2 teaspoons baking powder
½ teaspoon salt
1-9- or 10-ounce pkg. semi-sweet chocolate chips
1 cup chopped nuts, optional

Pre-heat oven to 350F degrees. Line a 9x13 baking pan with parchment paper, set aside.
In the bowl of an electric mixer, beat margarine at medium-high speed until fluffy. Add the sugars and beat until fluffy and well combined. Add vanilla, applesauce and flax mixture, beat until well combined.

Stir in remaining ingredients, except chocolate chips and stir on medium speed until blended. Stir in chocolate chips and nuts, if desired.  Spread evenly into prepared pan.
Bake for 40 to 45 minutes, or until golden brown on top.  Allow to cool completely on a wire rack. Cut into 24 bars.
Store covered at room temperature.


Yield: 24 bars


Tuesday, October 23, 2018

GFAF Expo

BS"D

My family, myself and the other Gluten Free and Allergen Free eating fans had a great time last week at the Gluten Free and Allergen Free Expo in Secaucus.  The GFAF Expo (#GFAFEXPO) occurs in numerous cities around the country throughout the year to highlight products and services that are helpful to live the Gluten Free and Allergen Free lifestyle.
Image result for PASCHA dark chocolate bar

 
Besides "old friends" like Enjoy Life foods, which puts on a magical walk through the allergen free "forest" picking up safe snacks along the way, we met new friends like Go Veggie, which gave us some wonderful kosher and dairy free Better for You Parmesan Sprinkle. As well, I tasted probably one of the best dairy free chocolates, Pascha. Their products, which include bars and chips, are nut, diary, soy, gluten, wheat (and more) free! One problem I find with high cacao chocolate is the chalky aftertaste. Pascha had an extremely clean finish and a silky mouthfeel. Rule breaker cookies produce chickpea flour based, vegan cookies. A new safe snack is always welcome!


Besides food, there are products like Nima, a portable device to test the actual gluten free status of foods. This year they brought a map that shows "safe" restaurants in NYC where the Nima confirmed the GF food ordered is indeed GF. I was happy to see the By The Way Bakery on the list, a great GF bakeshop I visited recently. And, it's always a delight to see Carol Kicinski and check out what's new at Simply Gluten Free.
Image result for nima

If you're interested in the visiting the GFAF Expo near you, check out their website for updates on early bird pricing.  Be sure to check out Rosie's review of the Expo on youtube.
Go Veggie Vegan Grated Parmesan Style Topping Soy-Free 4oz

I used the Go Veggie Parmesan Sprinkle to make a tempting side dish with my absolute favorite spaghetti squash. It's quick and easy and sure to please!

Everybody's Favorite Spaghetti Squash


1 medium spaghetti squash
water
2-4 Tablespoons Extra Virgin Olive Oil
2 cloves crushed garlic (you can sub garlic powder to taste)
Sea salt and fresh ground black pepper, to taste
1/4 cup Go Veggie Parmesan Sprinkles, more to taste

Pre-heat oven to 375F degrees.

Split spaghetti squash in half lengthwise. Remove seeds by scraping the center with a soup spoon. Place in a rectangular baking pan, and pour about 1 inch of water around squash.

Bake in pre-heated oven for 45 minutes to 1 hour. Poke a fork in the squash, it is done when the fork is easily inserted into the flesh.  Allow to cool enough to handle.

Spray a casserole dish with non-stick cooking spray. Using a fork, scrape flesh of squash into baking pan. Separate flesh into strands (this should happen naturally if you are using a fork).  Sprinkle with remaining ingredients and toss to coat.

Return to oven for a few minutes to warm through. For an extra cheesy experience, sprinkle a generous amount of the Parmesan Sprinkles on top of the casserole and broil for 5 minutes, or until browned.

Serves: 8


Thursday, September 13, 2018

Tzimmes under pressure

BS"D
Image result for carrots sweet potato


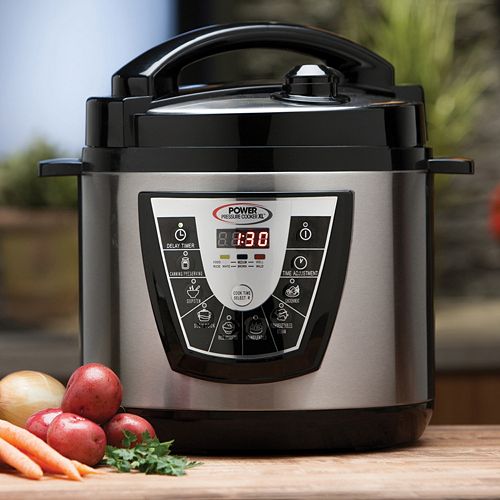
As Seen on TV Power Pressure Cooker XLSo I've been trying to replicate my grandmother's a''h and mother's tzimmes since I've had my own household.  I could never get the softness of the carrots right or the thickness of the sauce. I have tried it different ways, baking, simmering, with orange juice, with crushed pineapple and nothing worked. Since I have a love affair with my electric pressure cooker, I decided to give that a try. And the saying, try, try again paid off as I met with success! And, in minimal time.


So over the years I've learned a few things, baby carrots, for some reason, don't work, don't put too much liquid in the pot and there's no shame in using a little cornstarch for the thick glisteny texture you desire.

So in just 20 minutes (plus time to bring it up to pressure) I B"H had perfect tzimmes to accompany my Rosh Hashana meal, and enough to freeze for Yom Kippur!

This is a wonderful accompaniment to any roasted meat or chicken entree. It keeps for a week in the refrigerator, and reheats well.


My Heritage Tzimmes

4 large carrots, peeled and cut in 2 inch pieces
2 medium sweet potatoes, peeled and cubed
1/2 cup prunes, pitted
1/2 cup dried apricots
1/2 cup light brown sugar
1/4 cup honey
1 teaspoon ground cinnamon or 1 large cinnamon stick (discard after cooking)
1/4 teaspoon ground ginger
pinch cardamon
salt and pepper to taste
1/2 cup orange juice
1/2 cup water
1 Tablespoon corn starch

Place all items in the pot of an electric pressure cooker in the order listed. 

Secure lid and set to rice/beans setting for 20 minutes.

When done cooking release pressure. 

Remove vegetables and fruit to a container. 

Whisk corn starch into remaining liquid with pressure cooker on keep warm setting. When liquid is glisteny and thickened, pour over tzimmes and stir gently.

Serve warm

Yield: 10-12 servings

Thursday, September 6, 2018

Image result for just mayo


BS"D


When Just Mayo first introduced it's eggless mayo, I was in love. Now that it has FLAVORED mayo I'm over the moon!  I've been trying their new Garlic flavor product on a host of barbecue favorites like coleslaw, burgers and corn. It has a smooth consistency, the earthy spice of garlic flavor and best of all no weird, indescribable taste as, unfortunately is not uncommon in ersatz food products.

Image result for GFAF

Below I have a new and easy coleslaw recipe using convenient bagged cabbage and Just Mayo. If you love new learning about new gluten and allergy products, and love tasting them even more, come on down to the GFAF Expo. It will be in the Tri-State area at the conveniently located Meadowlands Convention Center in Secaucus, New Jersey on  October 13th and 14th. Check out all the news about the event on social media with #GFAFExpo.

If you love bargains as much as new products, click this link to get 30% off tickets with code EARLYBIRD (until September 12th)!


Easy Creamy Vegan Coleslaw
Try this on top of a burger.

1 cup Just Mayo Garlic Flavor
3 Tablespoons apple cider vinegar
1/2 Tablespoon agave nectar
2 Tablespoons fresh chopped dill
Sea salt and fresh ground black pepper, to taste
1-14 ounce bag coleslaw blend

In a large mixing bowl whisk the first 6 ingredients until smooth. Add the coleslaw and stir to blend. 

Chill 1 hour before serving. 

Store tightly covered in refrigerator


Saturday, September 1, 2018

BBQ...you don't know jack (fruit)!


BS"D

If you're like me you love yourself a good pulled bbq sandwich. If you're also like me the summer heat can be oppressive and you don't care to stand over the stove or que tending to a good piece of brisket or roasting a chicken (I don't eat the "other" popular pulled meat). So my electric pressure cooker is my bestie in the summer when it comes to cooking tender meat, healthy soups and a host of other dishes without heating up my kitchen.


Recently I came across canned jack fruit in a local store. I've been wanting to try this fruit which is often used in recipes as a vegan meat substitute. It most definitely has the fibrous, yet tender texture of meat. And, like tofu it has a neutral flavor that will soak up any sauce with which it's cooked. The price tag also is a bonus, as it was about a third of the price of using meat in this dish.  A number of different recipes online called for cooking methods and sauces that were quite long. As I mentioned I want to get in and out of the kitchen in the summer. So I subbed a favorite bottled BBQ sauce (Sweet Baby Ray's) and a quicker cooking method (the electric pressure cooker). I did need to finish it in the oven to achieve that pulled meat texture, but only for 15 minutes.


Served on a gluten free Udi's baguette with a cool and crunchy slaw topping (I used bagged broccoli slaw with a quick vinaigrette) and I had a roadside favorite without the fuss, muss and heat making it would usually incur. Oh, and did I mention it was delicious?


Pulled-BBQ Jack Fruit Sandwiches
1 Tablespoon olive oil
1 large onion, thinly sliced
1 garlic clove crushed
2-20 ounce cans Jack Fruit, drained
1/2-1 teaspoon hot sauce (optional)
salt and pepper to taste
1-18 ounce bottle favorite gluten free barbecue sauce
1/4 cup water

Heat an electric pressure cooker with the lid off (I usually put it on the "chicken/beef" setting to saute) and heat the oil. Add the onion and a pinch of salt. Saute until onions become translucent (about 5-6 minutes). Add the garlic and saute an additional minute.

Add the jack fruit, hot sauce, salt and pepper, barbecue sauce and water. Stir until well combined. 

Turn off pot and attach lid according to manufacturer directions.  Set pressure pot to cook for 20 minutes on the "chicken/beef" setting. When done release pressure valve.

Pre-heat oven to 400F degrees. Spread cooked jack fruit mixture on a large non-stick baking sheet. With two forks flake apart Jack Fruit until it looks like pulled brisket.  Bake for 15 minutes.

Serving suggestion: Spoon jack fruit onto crusty rolls or a baguette. Top with slaw of your choice and serve warm. 

Yield: 6 servings